
Scan tenant ID: complete user guide
Learn how to use Kamaru's AI-powered Scan ID feature to automatically extract tenant information from identity documents.
Scan ID is an AI-powered feature that automatically reads your tenant’s identity document and fills in their information for you. No more manual typing—just snap a photo of their ID, and let the AI do the work.
Supported documents
The Scan ID feature works with:
- National ID Cards — KTP Indonesia, MyKad Malaysia, NRIC Singapore, and others
- Driver’s Licenses — SIM Indonesia and international licenses
- Passports — All countries
How to use Scan ID
Step 1: Navigate to Add Tenant
From your property or room screen, tap Add Tenant to begin adding a new tenant.
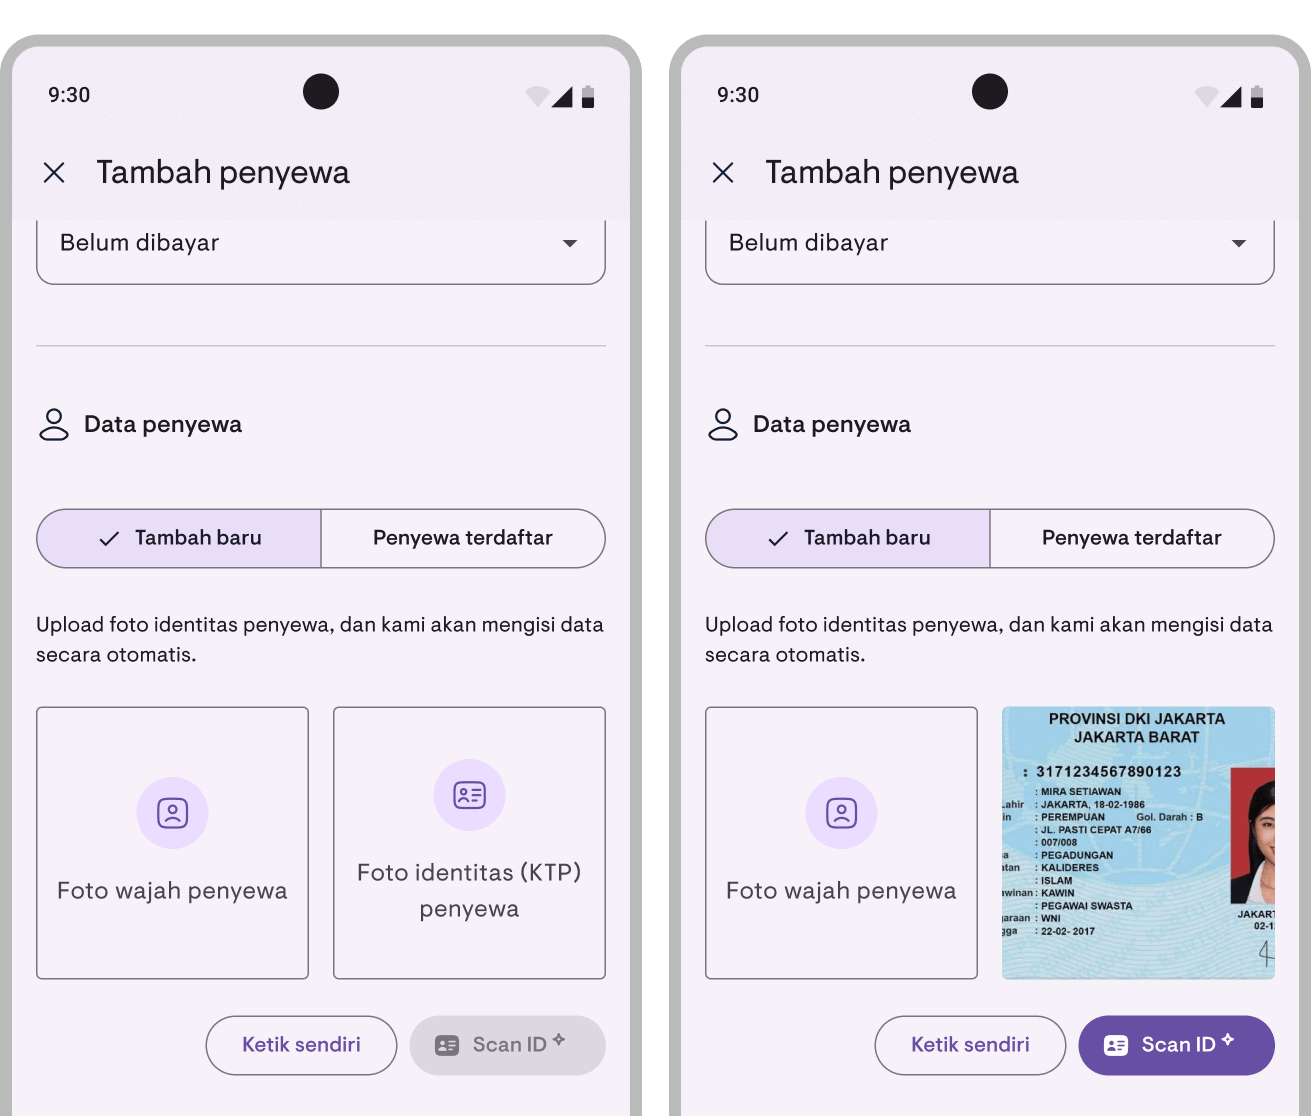
Step 2: Upload the ID photo
You’ll see two photo upload boxes:
- Face Photo (optional) — A photo of your tenant’s face
- ID Photo (required for Scan ID) — A photo of their identity document
Tap on “ID Photo” to upload. You can either:
- Take a new photo using your camera
- Choose an existing photo from your gallery
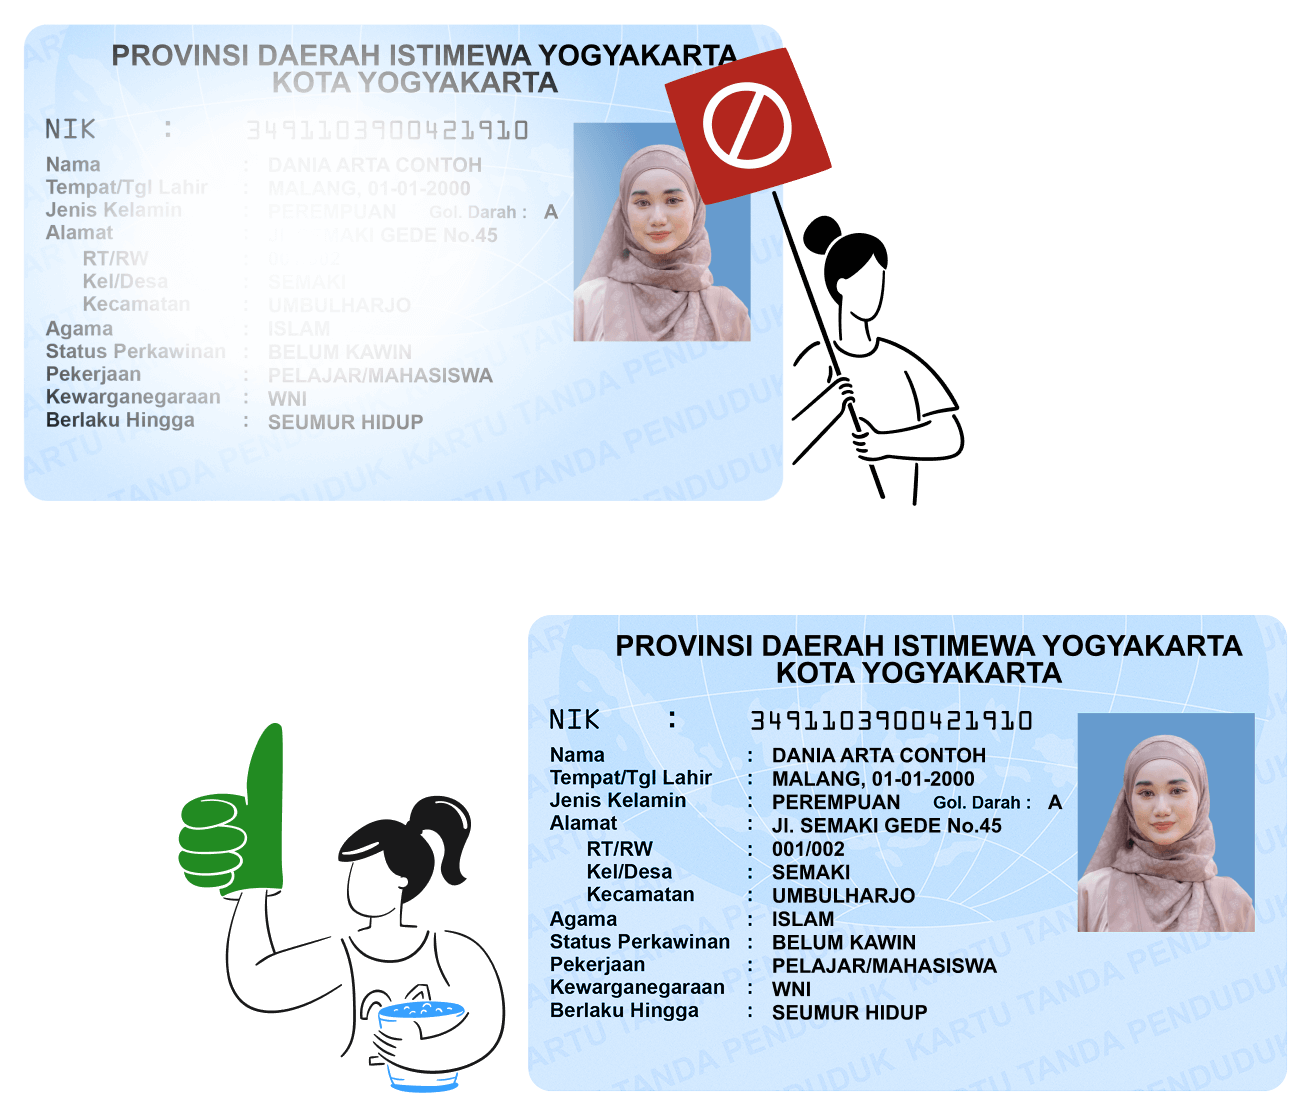
Tip: For best results, make sure the ID photo is:
- Well-lit (no shadows or glare)
- In focus (all text should be readable)
- Complete (all edges of the ID visible)
- Flat (avoid curved or bent cards)
Step 3: Tap “Scan ID”
Once the ID photo is uploaded, the Scan ID button becomes active. Tap it to start the AI scan.
You’ll see a loading indicator while the AI processes the image. This usually takes just a few seconds.
Step 4: Review the results
After scanning, the form automatically fills with the extracted information:
- Full Name
- ID Number (NIK/ID Card Number)
- Gender
- Date of Birth
- Place of Birth
- Address
- And more (depending on the ID type)
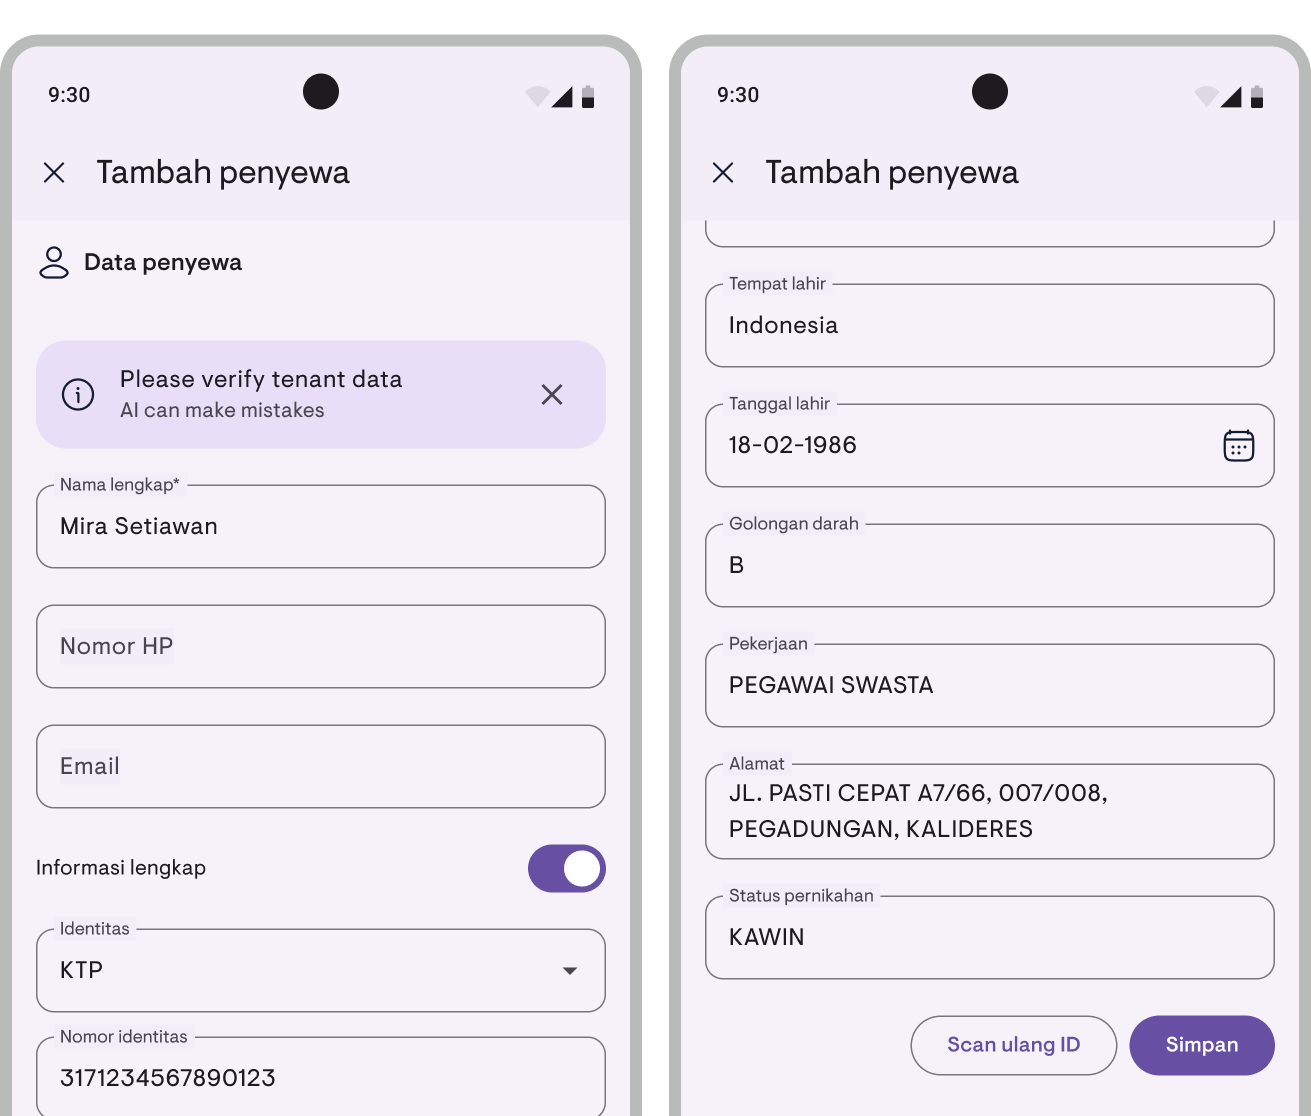
Important: A banner will appear reminding you to verify the data. AI can occasionally make mistakes, especially with:
- Handwritten text
- Worn or damaged IDs
- Poor photo quality
Take a moment to double-check that all information is correct before saving.
Step 5: Make corrections (if needed)
All fields are editable. Simply tap on any field to correct or update the information.
Step 6: Need to start over? Use Re-scan ID
If the scan results are significantly wrong (perhaps you uploaded the wrong photo), tap Re-scan ID. This will:
- Clear all filled data
- Remove the uploaded ID photo
- Let you upload a new photo and scan again
Tips for best results
| Do | Don’t |
|---|---|
| Use good lighting | Take photos in dim environments |
| Keep the ID flat | Photograph bent or curved cards |
| Include all edges | Crop parts of the ID |
| Keep the camera steady | Rush and get blurry photos |
| Clean dirty lenses | Use a scratched camera lens |
What data gets extracted?
Depending on the ID type, the AI can extract different fields:
From National IDs (KTP, MyKad, etc.)
- Full Name
- ID Number
- Gender
- Date of Birth
- Place of Birth
- Address
- Religion
- Marital Status
- Occupation
- Blood Type
From Driver’s Licenses
All of the above, plus:
- License Class (A, B, C, etc.)
- Issue Date
- Expiry Date
From Passports
- Full Name
- Passport Number
- Nationality
- Date of Birth
- Place of Birth
- Issue Date
- Expiry Date
Troubleshooting
“Please upload ID photo first” You need to upload an ID photo before you can use Scan ID. Tap on the ID Photo box to add one.
“Image does not appear to be an ID document” The AI couldn’t recognize the image as an ID. Make sure you’re uploading a clear photo of an actual identity document.
“Failed to process ID photo” Something went wrong during processing. Try taking a new, clearer photo and scan again.
“Hmm, the scan result might not be perfect…” The system was temporarily busy and used a backup scanner. Results may be less accurate—please verify carefully.
Privacy and security
- Your tenant’s ID photos are stored securely and encrypted
- The AI processing happens on secure servers
- Only you (the property owner) can access your tenant data
- ID photos are compressed after scanning to save storage space
Quick reference
Add Tenant → Upload ID Photo → Tap Scan ID → Verify data → Save
That’s it! You’ve just saved minutes of manual data entry.
Ready to try it? Download Kamaru and start scanning IDs today.
For a complete walkthrough of the app, check out our Getting started with Kamaru guide.
Have questions or feedback? We'd love to hear from you. Email us.

Start managing for free today
Join other landlords who are already using Kamaru to manage their properties.

